
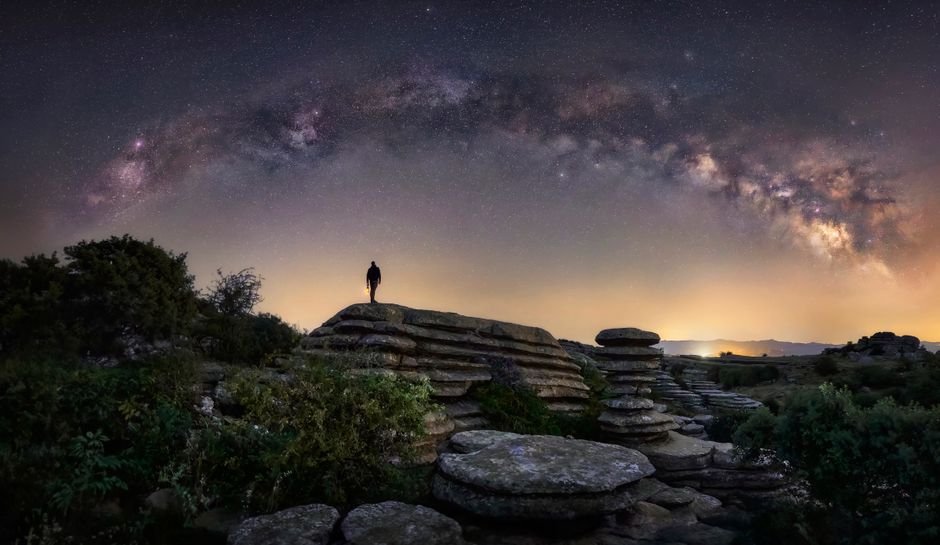
- 0
- 3,316 words
body { font-family: ‘Segoe UI’, Tahoma, Geneva, Verdana, sans-serif; line-height: 1.6; color: #333; max-width: 900px; margin: 20px auto; padding: 0 20px; background-color: #f9f9f9; }
h1 { color: #2c3e50; text-align: center; margin-bottom: 40px; font-size: 2.5em; }
h2 { color: #34495e; border-bottom: 2px solid #ccc; padding-bottom: 10px; margin-top: 40px; font-size: 1.8em; }
h3 { color: #2980b9; margin-top: 30px; font-size: 1.4em; }
p { margin-bottom: 1em; }
ul { list-style-type: disc; margin-left: 20px; margin-bottom: 1em; }
ol { margin-left: 20px; margin-bottom: 1em; }
li { margin-bottom: 0.5em; }
strong { color: #e74c3c; }
em { font-style: italic; }
code { background-color: #eee; padding: 2px 4px; border-radius: 3px; font-family: ‘Courier New’, Courier, monospace; }
Have you ever gazed up at a truly dark night sky, overwhelmed by the sheer number of stars, and wished you could capture that breathtaking view? Astrophotography allows you to do just that, transforming fleeting moments under the cosmos into stunning, lasting images.
This comprehensive guide will walk you through the exciting process of photographing the world’s darkest skies, from planning your adventure to perfecting your final image, helping you celebrate the universe’s profound beauty.
What You’ll Need for Your Astrophotography Journey
Before you embark on your stellar quest, gathering the right equipment is crucial. While some items are essential, others will significantly enhance your experience and results.
- DSLR or Mirrorless Camera: You’ll need a camera that allows full manual control over aperture, shutter speed, and ISO. Full-frame sensors generally perform better in low light due to larger pixels, but modern APS-C cameras can also produce fantastic results. Ensure it can shoot in RAW format.
- Wide-Angle Lens: A fast, wide-angle lens is your best friend for capturing expansive nightscapes. Look for lenses with an aperture of f/2.8 or wider (e.g., f/1.8, f/1.4) and a focal length between 14mm and 24mm (on full-frame). The wider aperture lets in more light, and the wider field of view captures more of the sky and foreground.
- Sturdy Tripod: Long exposures are the cornerstone of astrophotography, making a robust and stable tripod non-negotiable. It must hold your camera steady, even in light wind, to prevent blurry images.
- Remote Shutter Release or Intervalometer: Pressing the camera’s shutter button can introduce shake, blurring your long exposure. A remote trigger (wired or wireless) or an intervalometer allows you to fire the shutter without touching the camera. Many cameras also have a built-in 2-second timer that can serve a similar purpose in a pinch.
- Headlamp with Red Light Mode: A headlamp is essential for navigating in the dark, but white light will destroy your night vision (and that of others). A red light preserves your eyes’ adaptation to the dark, allowing you to see the stars better and maintain situational awareness.
- Extra Batteries: Cold temperatures rapidly drain camera batteries. Always pack at least two fully charged spares, and keep them in a warm pocket until needed.
- Warm Clothing and Supplies: Even on seemingly mild nights, temperatures can drop significantly in dark sky locations. Dress in layers, including a warm hat, gloves, and insulated boots. Bring snacks, water, and a thermos with a hot beverage to stay comfortable and energized.
- Star Chart/Planning App: Apps like PhotoPills, SkyView, Stellarium Mobile, or The Photographer’s Ephemeris are invaluable. They help you scout locations, track the Milky Way’s position, check moon phases, predict celestial events, and identify light pollution.
- Post-Processing Software: Programs like Adobe Lightroom, Adobe Photoshop, Affinity Photo, or GIMP are essential for bringing out the hidden details and vibrant colors in your RAW astrophotography files.
- Optional but Recommended:
- Star Tracker: For truly long exposures (minutes instead of seconds) without star trails, a star tracker rotates your camera to match the Earth’s rotation. This allows for lower ISOs and cleaner images but adds complexity.
- Portable Power Bank: Useful for recharging your phone, headlamp, or even a star tracker if you have one.
- Dew Heater: In humid conditions, condensation can form on your lens, fogging up your shots. A dew heater (a band that wraps around the lens and warms it slightly) prevents this.
Steps to Astrophotography Success
Astrophotography is a blend of planning, patience, and technical skill. Follow these steps to maximize your chances of capturing stunning images of the night sky.
1. Plan Your Cosmic Expedition Meticulously
Success in astrophotography begins long before you even leave your home. Careful planning is paramount to ensure you’re in the right place, at the right time, with the right conditions.
- Location Scouting: Use light pollution maps (like lightpollutionmap.info or apps like PhotoPills) to find truly dark sky locations. Look for Bortle Scale Class 1-3 areas, far from city lights. Consider Dark Sky Parks or designated wilderness areas.
- Moon Phase: The moon is a giant natural light source. For deep-sky objects and the Milky Way, you want a new moon or a thin crescent moon that sets early or rises late. Check a lunar calendar for the dates around the new moon.
- Weather Forecast: Clear skies are non-negotiable. Check multiple weather forecasts for your chosen location, paying close attention to cloud cover, haze, and wind speed. Even a thin layer of high clouds can obscure the stars.
- Celestial Events: Research if any meteor showers, planetary alignments, or other interesting celestial phenomena will be visible during your planned outing. This can add unique elements to your photos.
- Milky Way Core Visibility: If your goal is to photograph the Milky Way’s galactic core, you need to know when and where it will be visible in the sky for your specific location and date. Planning apps are invaluable for this.
- Safety First: Always tell someone where you’re going and when you expect to return. Research the terrain and potential hazards of your chosen location. Pack emergency supplies.
2. Assemble and Prepare Your Astrophotography Arsenal
Once your plan is solid, it’s time to get your gear ready. Thorough preparation prevents frustration and missed opportunities in the field.
- Charge Everything: Ensure all camera batteries, remote triggers, headlamps, and power banks are fully charged. Cold weather drains batteries faster, so over-prepare.
- Pack Methodically: Organize your gear in a sturdy camera bag, ensuring everything is easily accessible. Include lens cloths, a small microfiber towel (for dew), and any optional accessories.
- Initial Camera Settings:
- Set your camera to RAW format (never JPEG) to capture the maximum amount of image data for post-processing.
- Switch to Manual mode (M) to have full control.
- Set your aperture to its widest opening (lowest f-number), e.g., f/2.8, f/1.8. This lets in the most light.
- Set your ISO to a relatively high value, typically between 1600 and 6400, depending on your camera’s low-light performance. You’ll adjust this in the field.
- Determine an initial shutter speed using the “500 Rule” (or “NPS Rule” for modern cameras). Divide 500 by your lens’s focal length (e.g., 500 / 20mm = 25 seconds). This gives you the maximum exposure time before stars start to trail significantly. For APS-C cameras, multiply your focal length by your crop factor (e.g., 1.5x for Nikon/Sony, 1.6x for Canon) before dividing. So for a 20mm lens on an APS-C 1.5x crop sensor, it would be 500 / (20 * 1.5) = 500 / 30 = ~16 seconds.
- Turn Image Stabilization (IS/VR/OS) OFF when on a tripod.
- Lens Preparation: Remove any filters (UV, polarizing, etc.) from your lens, as they can cause unwanted reflections or reduce light transmission. Clean your lens glass thoroughly.
3. Navigate to Your Dark Sky Sanctuary and Set Up
Arriving at your chosen spot requires patience and caution, especially in unfamiliar dark environments. Give yourself ample time to set up without rushing.

- Arrive Early: If possible, arrive at your location before sunset. This allows you to scout potential compositions in daylight, identify any foreground elements, and find a stable spot for your tripod. It also helps you get a feel for the surroundings before it gets pitch black.
- Safety First: Be mindful of your surroundings. Watch your footing, especially on uneven terrain. Inform others of your presence if you’re in a shared area.
- Set Up Your Tripod: Extend your tripod legs fully and ensure it’s on a stable, level surface. Attach your camera securely to the tripod head.
- Level Your Camera: Use your camera’s built-in level (if it has one) or a hot-shoe bubble level to ensure your horizon is straight.
- Acclimatize Your Eyes: Once you’re set up, turn off any white lights and allow your eyes about 15-20 minutes to fully adjust to the darkness. This will dramatically improve your ability to see the stars and compose your shot. Only use your headlamp’s red light mode when you need to interact with your gear.
4. Compose Your Frame Under the Starry Veil
Composition is key to a compelling astrophotograph. Don’t just point your camera at the sky; think about how to create a balanced and interesting image.
- Foreground Interest: Including a compelling foreground element (trees, mountains, rock formations, an old barn, a lake) adds depth, context, and scale to your image, preventing it from being just a flat sky shot.
- Rule of Thirds: Apply classic compositional rules. Place your main celestial subject (like the Milky Way core) or your foreground interest along the rule of thirds lines or at their intersections.
- Milky Way Alignment: Use your planning app to determine where the Milky Way will be in the sky. Position your camera to capture its brightest parts, often arcing across the frame.
- Crucial Step: Focusing to Infinity: This is arguably the most critical and challenging part of astrophotography.
- Switch your lens to Manual Focus (MF).
- Turn on your camera’s Live View.
- Zoom in digitally (using the magnification buttons on your camera) as much as possible on the brightest star or a distant light source.
- Carefully rotate the focus ring until the star appears as a tiny, sharp pinpoint of light. Avoid focusing all the way to the “infinity” mark on your lens, as this is often not true optical infinity.
- Once focused, consider taping your focus ring with gaffer tape to prevent accidental bumps from shifting it.
5. Capture Your First Glimpse of the Cosmos
With your camera set up and focused, it’s time to start taking pictures. This often involves a process of trial and error to dial in the perfect exposure.
- Initial Test Shot: Using your previously determined settings (e.g., ISO 3200, f/2.8, 20-second shutter speed), take your first shot.
- Review and Adjust:
- Check the Histogram: Don’t rely solely on your camera’s LCD screen, which can be deceiving in the dark. Instead, check the histogram. You want the data to be pushed to the right side of the graph without clipping the highlights (meaning no data is touching the far right edge), indicating you’re capturing sufficient light. If it’s too far to the left, increase your ISO or shutter speed.
- Evaluate Composition: Is your foreground well-placed? Is the Milky Way where you want it?
- Critically Check Sharpness: Zoom in 100% on a star. Is it a perfect pinpoint? If not, re-adjust your focus.
- Adjust Settings:
- If the image is too dark, increase your ISO (e.g., from 3200 to 6400).
- If stars are trailing, decrease your shutter speed (e.g., from 25 seconds to 20 seconds).
- If the image is too bright, decrease your ISO or shutter speed.
- Use Your Remote Shutter Release: Once your settings are dialed in, use your remote to trigger the shutter, ensuring absolutely no camera shake.
- Take Multiple Shots: Even if you’re not planning to stack images for noise reduction (an advanced technique), taking several identical shots is good practice. This gives you options and can be useful if one shot has an unexpected anomaly (like a plane trail).
6. Review Your Stellar Shots in the Field
Before packing up, take a moment to thoroughly review your captured images. This can save you from discovering missed opportunities once you’re back home.
- Zoom In, Zoom In, Zoom In: The small LCD screen can hide a multitude of sins. Zoom in to 100% on your stars to confirm they are sharp pinpoints and not blurry trails or out of focus smudges.
- Check the Histogram (Again): Re-evaluate your histogram. It’s your most accurate tool for assessing exposure. Ensure you have a good range of tonal information without significant clipping at either end.
- Look for Unwanted Light: Scan your images for unexpected light pollution from distant towns, car headlights, or even your own headlamp if you accidentally pointed it at your lens.
- Monitor for Dew: Check your lens for condensation. If you see fogging, use a microfiber cloth to gently wipe it, or activate your dew heater if you have one.
7. Embark on the Post-Processing Journey
RAW files are like digital negatives – they hold immense potential but need development. Post-processing is where you truly bring your astrophotography to life.
- Import Your RAW Files: Transfer your images from your camera’s memory card to your computer and import them into your chosen post-processing software.
- White Balance Adjustment: Night sky images often benefit from a cooler white balance. Start by setting it to a cooler temperature (e.g., 3500-4500K) or use the eyedropper tool on a neutral part of your foreground.
- Basic Adjustments:
- Exposure: Gently increase exposure to brighten the overall image.
- Contrast: Add contrast to make the bright areas brighter and dark areas darker, enhancing the Milky Way.
- Highlights & Shadows: Recover detail in overly bright stars or deep shadows in your foreground.
- Clarity & Dehaze: These sliders can be incredibly effective for enhancing the nebulosity of the Milky Way and reducing any atmospheric haze, making the stars pop. Use them subtly to avoid an artificial look.
- Noise Reduction: High ISO settings inevitably introduce noise. Apply luminance noise reduction to smooth out graininess and color noise reduction to eliminate colored speckles. Be careful not to overdo it, as excessive noise reduction can soften details.
- Sharpening: After noise reduction, apply a subtle amount of sharpening to bring back definition, especially to the stars.
- Local Adjustments: This is where you can selectively enhance parts of your image.
- Use a radial filter or brush to specifically brighten and add clarity/contrast to the Milky Way core.
- Use a gradient filter or brush to subtly darken your foreground or reduce any sky glow near the horizon.
- Lens Corrections: Enable profile corrections to automatically remove vignetting (dark corners) and chromatic aberration (color fringing) introduced by your lens.
- Crop and Straighten: Fine-tune your composition and ensure your horizon is perfectly level.
- Export: Save your final image as a high-quality JPEG for sharing online or a TIFF for printing.
8. Share Your Celestial Masterpiece
After all your hard work, don’t keep your stunning images to yourself! Sharing your astrophotography is part of the joy and can inspire others.
- Online Galleries: Platforms like 500px, Flickr, and Instagram are great places to showcase your work and connect with other photographers.
- Astrophotography Communities: Join dedicated online forums or local clubs. These communities offer valuable feedback, learning opportunities, and inspiration.
- Print Your Work: Seeing your astrophotographs printed large can be incredibly rewarding, revealing details you might miss on a screen.
- Seek Feedback: Don’t be afraid to ask for constructive criticism. It’s a fantastic way to learn and improve your skills.
Tips and Common Mistakes to Avoid
Even seasoned astrophotographers learn new things with every outing. Here are some tips to help you on your journey and common pitfalls to steer clear of.
Tips for Success:
- Practice During the Day: Familiarize yourself with your camera’s manual controls and menu settings in daylight so you’re not fumbling in the dark.
- Dress Warmly, Always: Even on a seemingly mild night, temperatures drop. Layers are your best friend.
- Patience is Key: Astrophotography requires waiting for the right conditions, for your eyes to adjust, and for long exposures to complete. Embrace the stillness.
- Experiment with Settings: Don’t be afraid to deviate from recommended settings. Every location and night is different.
- Protect Your Lens from Dew: Condensation can ruin your shots. Use a lens hood, a dew heater, or even a hand warmer taped to your lens barrel.
- Use a Red Headlamp: Seriously, white light is the enemy of night vision.
- Bring a Friend: For safety, companionship, and an extra set of eyes (and hands!).
Common Mistakes to Avoid:
- Forgetting Fully Charged Batteries: This is a classic and highly frustrating mistake.
- Incorrect Focus: Blurry stars are the most common beginner error. Double-check your focus every time.
- Shaky Tripod/Camera Movement: Any movement during a long exposure will result in blurry or trailed stars.
- Ignoring Light Pollution: Even distant light sources can cast a glow and reduce the visibility of the Milky Way.
- Shooting in JPEG Instead of RAW: JPEG files discard too much data, severely limiting your post-processing capabilities.
- Over-Processing: Too much noise reduction, sharpening, or clarity can make your images look artificial or “crunchy.”
- Not Checking the Histogram in the Field: Relying solely on the LCD brightness can lead to underexposed images.
- Not Planning Properly: Showing up without checking the moon phase, weather, or Milky Way position is a recipe for disappointment.
Final Thoughts on Your Astrophotography Adventure
Astrophotography is more than just taking pictures; it’s an immersive experience that connects you with the vastness of the universe. The journey of finding dark skies, battling the elements, and patiently capturing photons from billions of miles away is incredibly rewarding.
Don’t get discouraged by initial challenges. Every outing is a learning opportunity, and with persistence, you’ll soon be creating stunning images that truly celebrate the beauty of the world’s darkest skies. So, grab your gear, look up, and let the cosmic adventure begin!
Frequently Asked Questions
Why is a fast, wide-angle lens considered essential for capturing night skies?
A fast, wide-angle lens is crucial because its wide aperture (f/2.8 or wider) allows the camera to gather significantly more light from the dim night sky, which is essential for capturing faint stars and nebulae. Additionally, its wide field of view (14mm-24mm) enables you to capture expansive nightscapes, including both the celestial objects and a compelling foreground, creating a more dramatic and immersive image. This combination helps transform the breathtaking view into a stunning photograph.
What kind of camera is best suited for astrophotography, and why are certain features important?
For astrophotography, a DSLR or mirrorless camera offering full manual control over aperture, shutter speed, and ISO is essential. Manual control allows you to precisely adjust settings for the unique challenges of low-light conditions. While full-frame sensors often excel due to their larger pixels and superior low-light performance, modern APS-C cameras can also yield excellent results. Additionally, the ability to shoot in RAW format is crucial for maximizing image quality and flexibility during post-processing.
How does camera shake impact astrophotography, and what equipment helps mitigate it?
Camera shake is a significant concern in astrophotography because it can easily blur images, especially during the long exposures required to capture faint starlight. Even a slight movement, like pressing the shutter button, can ruin a shot. To combat this, a sturdy and stable tripod is non-negotiable, ensuring your camera remains perfectly still. Furthermore, using a remote shutter release or intervalometer prevents any direct contact with the camera, eliminating shake introduced by manual button presses and guaranteeing sharper, clearer celestial images.
Author

96livemarketing@gmail.com
Related Posts
Luminous object lights up Brunei’s evening sky – The Star
- 0
- 3,076 words
⏱15 min readOn this pageWhat You’ll NeedSteps1. Prepare for Observation and Familiarize Yourself with the Night Sky2. Initial Sighting and Quick Assessment3....
Read out all
Snake, rattled, rolls away: reptile’s 9mph dash to escape predators – The Times
- 0
- 2,653 words
⏱12 min readOn this pageWhat You’ll NeedSteps to Understanding Snake Escape Strategies1. Understand the Basics of Snake Movement and Speed2. Identify Common...
Read out all
Tan-Thinaah capture Denmark Open crown, end 18-year wait – Malaysiakini
- 0
- 2,463 words
⏱10 min readOn this pageWhat You’ll NeedSteps1. Relive the Moment: Watch the Match Highlights and Full Match2. Understand Their Journey: Research Tan-Thinaah’s...
Read out all
Johor schools, educational institutions to reman closed for 5 more days – CNA
- 0
- 2,245 words
⏱10 min readOn this pageWhat You’ll NeedSteps1. Stay Informed and Calm2. Establish a Routine (But Be Flexible!)3. Set Up a Dedicated Learning...
Read out all
Pearly–Thinaah break new ground in Denmark – NST Online
- 0
- 2,189 words
⏱9 min readOn this pageWhat You’ll NeedSteps to Achieve Breakthrough Success1. Define Your “Breakthrough” with Crystal Clarity2. Forge an Unbreakable Partnership (or...
Read out all
Sze Fei-Izzuddin through to Denmark Open quarter-finals – Free Malaysia Today
- 0
- 2,743 words
⏱12 min readOn this pageWhat You’ll NeedSteps1. Understand the Badminton World Federation (BWF) Structure2. Identify Key Information Sources3. Decipher Tournament Draws and...
Read out all